Homeowners Share Costly Lessons from Real Experiences
Homeowners Share Costly Lessons from Real Experiences
Installing underfloor heating should bring warmth—unfortunately, for some, the trouble comes first.
Many first-time homeowners find themselves in unexpected situations: swapped materials, chaotic construction, unprofessional workers… Every issue adds stress and uncertainty.
If done wrong, underfloor heating can turn from a comfort upgrade into a renovation nightmare.
Here are real stories from homeowners who learned lessons the hard way. We hope their experiences help you avoid the same pitfalls.
Case 1: Materials Were Switched
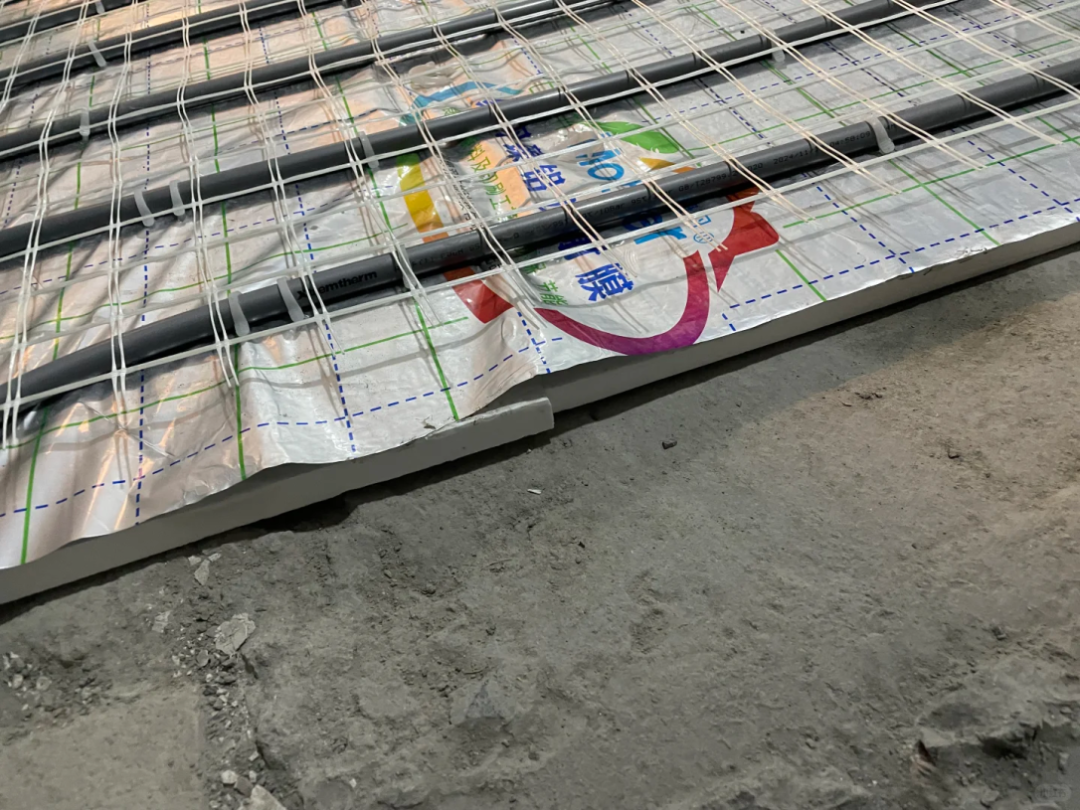
“We didn’t check the materials at first. When we visited the site mid-installation, we realized they weren’t using the brand we had selected!”
Earthmother Tip:
Always verify incoming materials — brand, model, and quantity. Do not skip this step.
Case 2: Gaps Around Electrical Pipes
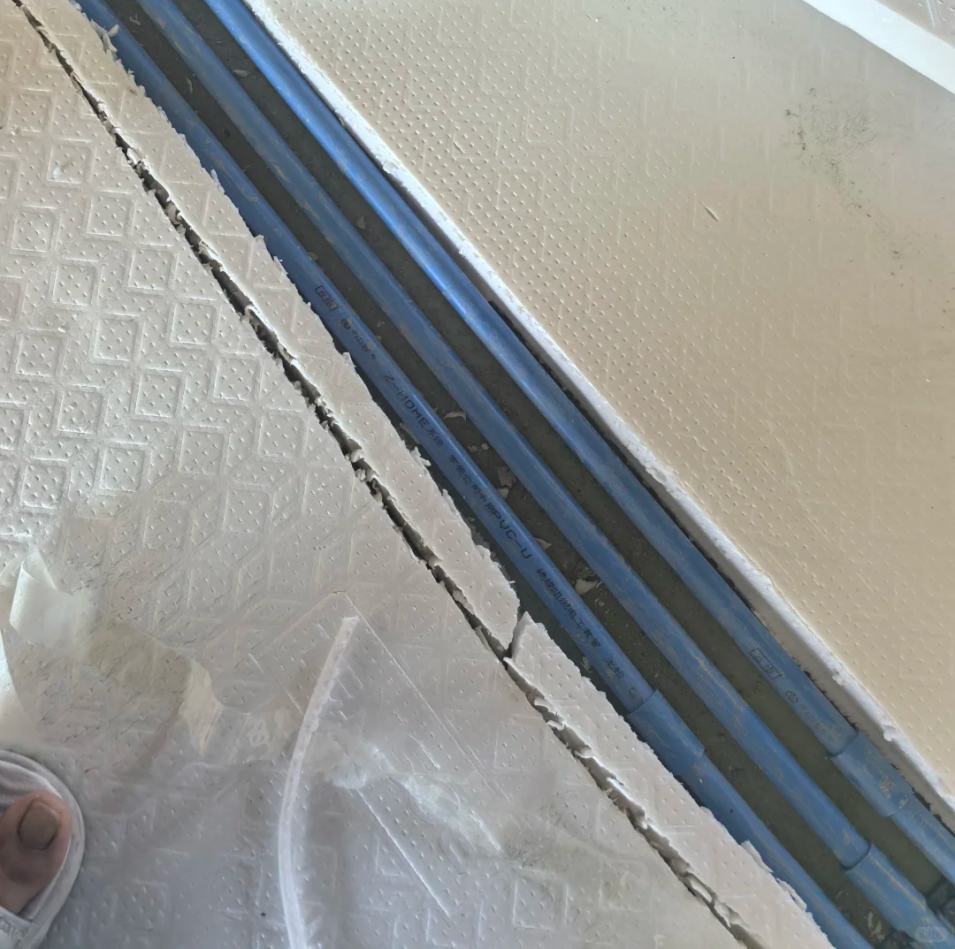
“There were visible gaps between the insulation boards due to uncut electric conduits. The installer said it was ‘fine.’ Is this acceptable?”
Earthmother Tip:
You can fill gaps with PU foam and cover them with thermal break sheets. If ceiling height allows, adding an extra layer of insulation board is a more reliable solution.
Case 3: Site Was Altered Without Permission
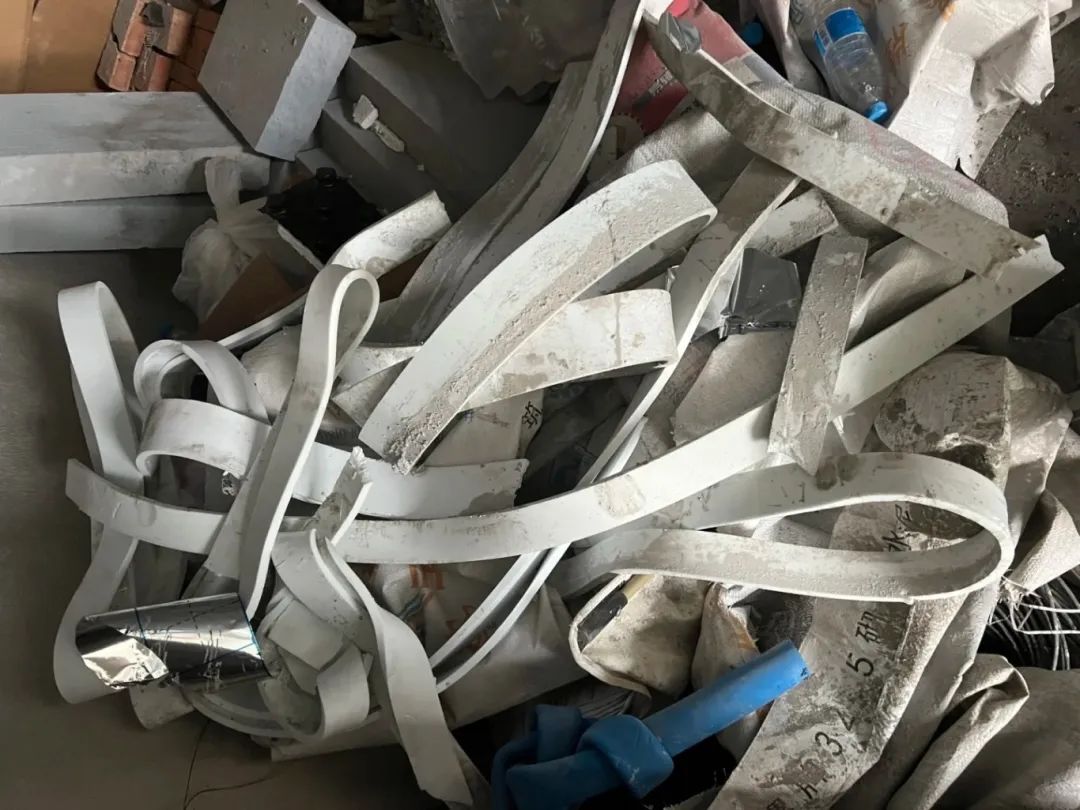
“A tile worker tore off all the edge insulation strips because he said they were ‘in the way.’ I paid for those materials—they were wasted!”
Earthmother Emphasis:
Edge insulation strips are essential. They help prevent heat loss to the wall and absorb expansion stress from the screed layer. If they extend too high, simply trim the excess—never remove them entirely.
Case 4: Sloppy Screed Work
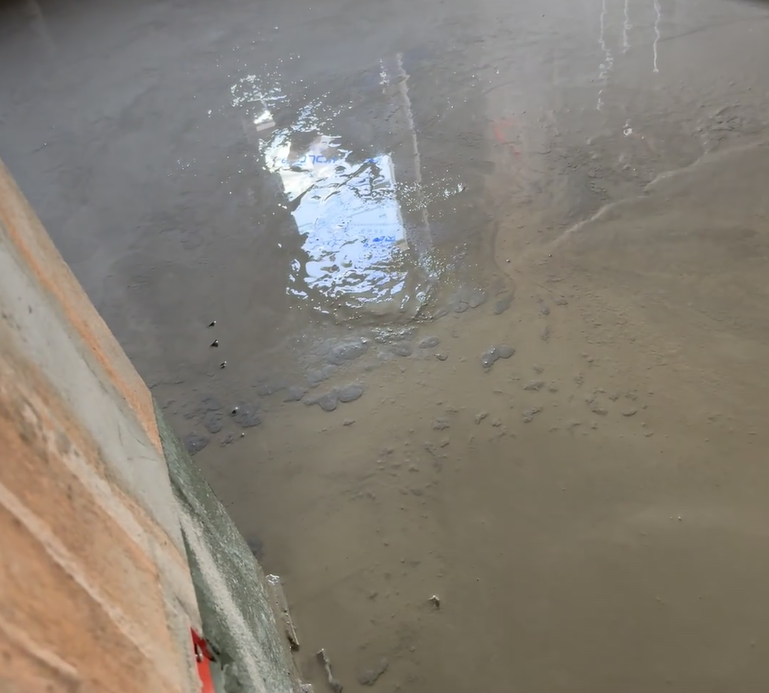
“The backfill wasn’t mixed evenly, and no one checked the thickness. The team promised good quality but didn’t answer my calls when issues appeared.”
Earthmother Tip:
The photo shows bleeding water, likely due to poor mixing and excessive water. This leads to weak, sandy surfaces later. Always follow the correct mixing ratio, use buckets for consistent batching, and mix thoroughly before pouring.
Case 5: Incomplete Edge Insulation
“I noticed edge insulation wasn’t applied to interior walls. The worker said only exterior walls need it. Is that true?”
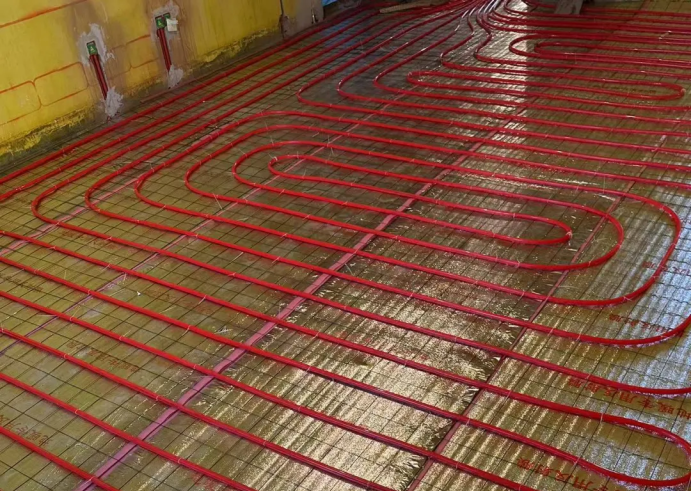
Earthmother Tip:
Edge insulation should be applied to both interior and exterior walls. It helps retain heat and absorbs expansion from the heated screed to prevent floor cracking.
Case 6: Uneven Screed + Exposed Pipes
“There are uneven spots and some pipes aren't even covered. One area where cabinets will go wasn’t filled at all. Should we use self-leveling later?”
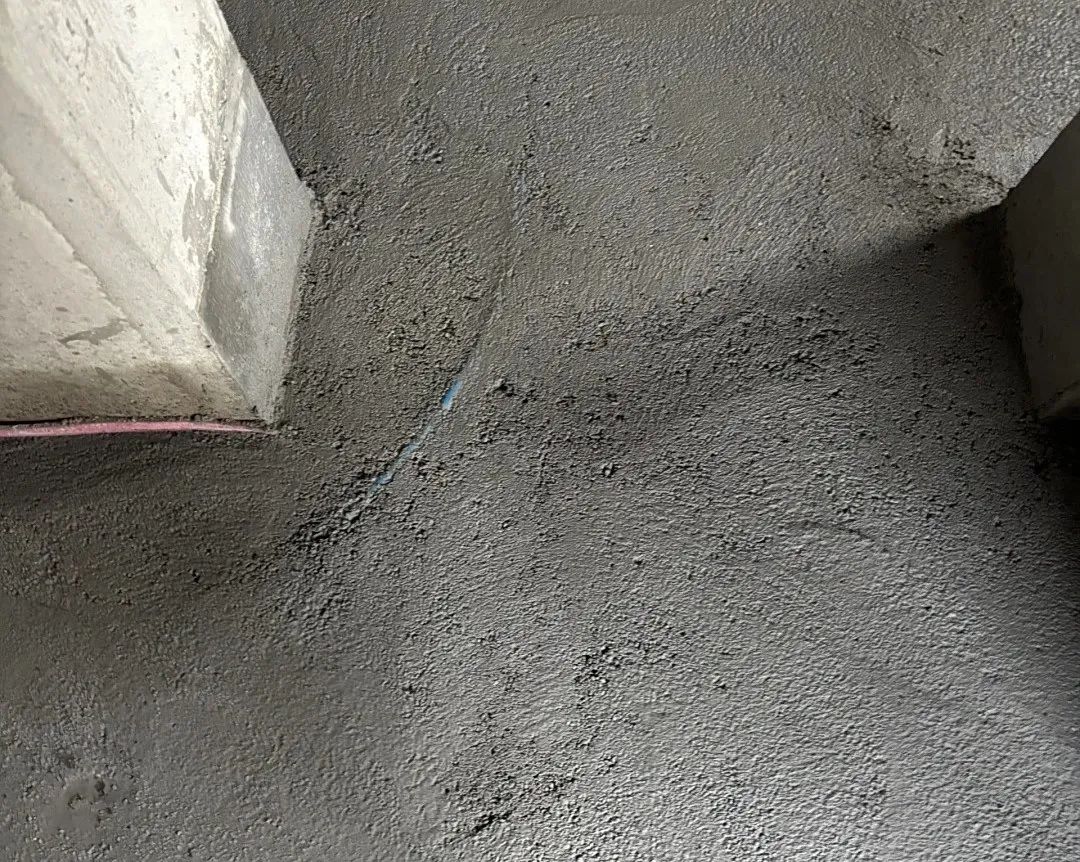
Earthmother Tip:
The screed layer should be at least 1cm above the pipe. In this case, the layer is too thin. For tile flooring, an extra 2cm of leveling screed may be needed afterward.
Case 7: Poor Workmanship
“The pipe layout looked sloppy—nothing like the photos I saw online. The spacing didn’t look consistent. Could this affect performance?”
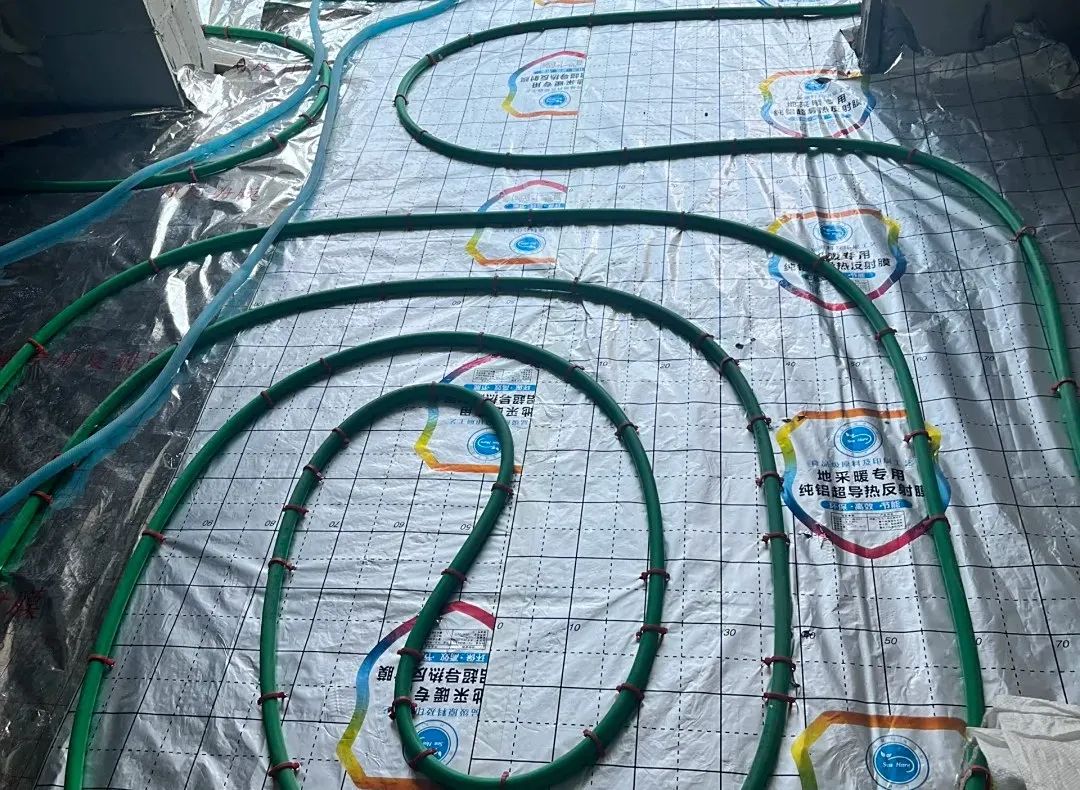
Earthmother Tip:
Uneven pipe spacing causes hot and cold spots on the floor. Different pipe sizes have standard spacing requirements. Proper installation should strictly follow those standards.
Earthmother’s Final Advice for First-Time Installers:
- Choose a trusted company:
Beware of low-price traps. Check reviews, past projects, and legal credentials. - Read the contract carefully:
Include brands, models, specifications, and detailed work scopes. The more detailed, the more protected you are. - Be present during inspections:
Check key phases: material arrival, pipe layout, and screed work. - Keep records:
Take photos/videos, save communication records, and keep all contracts and receipts—they may save you later.